I Almost Bricked My Own PC: An AM5 BIOS-Flashback Story
Updated 2026-08-31
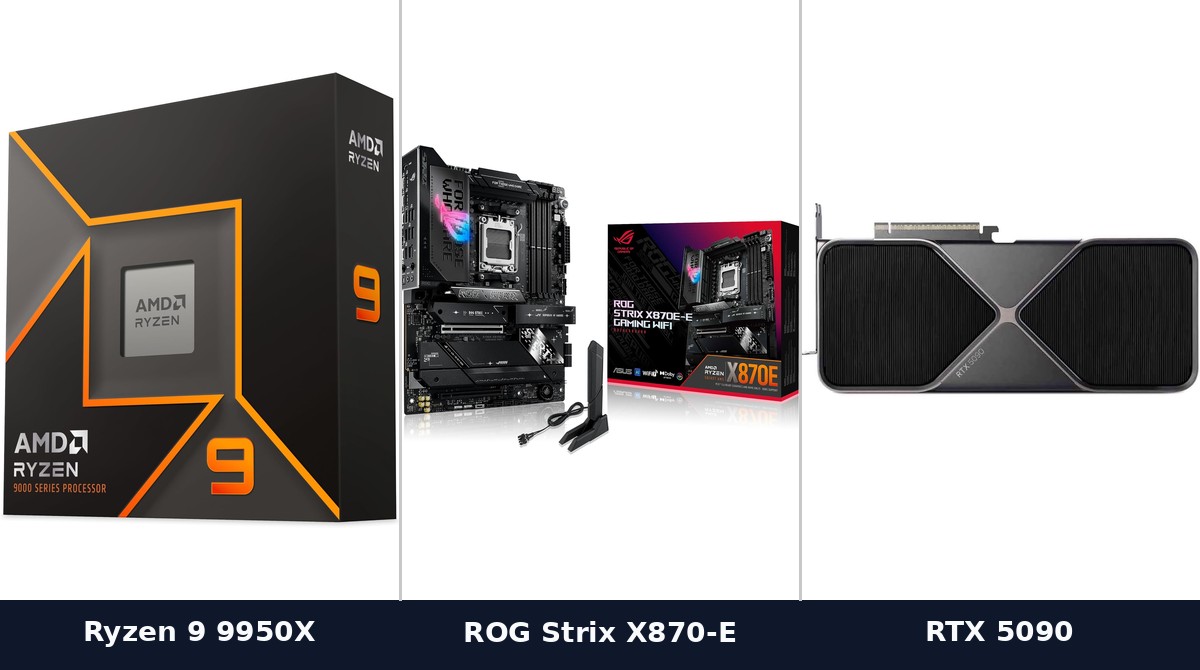
A motherboard bought months before a new CPU’s launch can ship with a BIOS that has never heard of that CPU: the board powers on, fans spin, and nothing else happens. The fix is almost always USB BIOS Flashback: a way to update the firmware with no CPU, RAM, or GPU installed at all. It took me most of a Saturday to learn that, mostly because I refused to believe a brand-new $1,600 motherboard could be the problem.
The Rebuild
The plan was simple on paper: retire a three-year-old rig, drop in a Ryzen 9 9950X, an ASUS ROG Strix X870E-E, and an RTX 5090, and have a finished PC before dinner. I’d done this a dozen times. New CPU in socket, cooler mounted, RAM in the right slots (motherboard manuals always say which two of four, and I actually read it this time), GPU seated, cables connected. Closed the case. Hit power.
Fans spun. RGB lit up like a Christmas display. And the monitor stayed black.
The Silence After Pressing Power
No POST beep (this board doesn’t have a speaker unless you add one), but no video signal either, and no BIOS splash screen. Just the ASUS Q-Code display on the motherboard itself cycling through a code I didn’t recognize, sitting on one that, according to the manual’s little printed table, meant “CPU not initialized.”
My first move was the classic troubleshooting loop: reseat the RAM, reseat the GPU, check the 24-pin and both 8-pin CPU power connectors, clear CMOS with the little button on the rear I/O. Nothing changed. Q-Code stayed the same.
The part I got wrong here: I assumed a board this new, bought this month, must already support a CPU that had also just launched. That assumption cost me two hours.
The Actual Problem
Motherboards ship with whatever BIOS was current on the day they left the factory, which can be weeks or months before a newly launched CPU exists at all. The board doesn’t “not support” the new chip out of malice; it’s running firmware that predates it, and firmware is the only thing that knows how to initialize a given CPU’s microcode. No matching BIOS, no boot. Full stop. It doesn’t matter how correctly everything else is installed.
The tell, in hindsight, was obvious: I could have checked the motherboard’s CPU support list on ASUS’s own product page before buying anything, cross- referenced the BIOS version that added support against the board’s shipping BIOS revision (both are usually listed), and known in advance whether an update was needed. I didn’t, because I’d never had to think about it on older, more mature platforms where every board already supported every CPU on the shelf next to it.
BIOS Flashback: The Feature I’d Never Used
This is the part that actually saved the day, and it’s worth knowing before you need it, not while you’re mid-panic on a Saturday:
- Download the correct BIOS file from the motherboard’s own support page, not a mirror and not a forum upload, matched to the exact board revision.
- Rename it to the exact filename ASUS’s manual specifies and put it, alone, in the root of a FAT32-formatted USB drive.
- Plug the drive into the specifically labeled BIOS Flashback USB port on the rear I/O, not just any USB port, the one marked for this.
- With the system fully powered off but the PSU switched on, hold the dedicated Flashback button for a few seconds.
- Wait. A small LED near the button blinks while it flashes, then turns solid, then off when it’s done, usually several minutes. Do not touch the power supply, unplug anything, or lose patience during this window.
The genuinely useful part: none of this needs a CPU, RAM, or GPU installed. It’s a feature built for exactly this situation: a board that can’t even initialize enough to show you a BIOS screen, because the missing piece is the BIOS itself, not anything you can diagnose by reseating.
Ten minutes after the LED went solid, I put the CPU, RAM, and GPU back in, hit power, and got a normal boot straight to the BIOS setup screen, one that this time actually recognized the 9950X.
What Actually Changed
| Step | Before Flashback | After Flashback |
|---|---|---|
| Q-Code on boot | Stuck at “CPU not initialized” | Clean POST |
| Display output | None | BIOS setup screen |
| BIOS version | Shipping revision (pre-dated the CPU) | Current revision (Ryzen 9000-series support) |
| Time spent | ~2 hours troubleshooting the wrong things | ~15 minutes, once I knew what to do |
What I’d Tell Past Me
- Check CPU support lists before buying, not after. Every AM5 board’s product page lists exactly which BIOS version added support for which CPU generation, and what BIOS revision the board ships with. Five minutes here would have told me to flash before installing anything.
- A missing display isn’t always a seating problem. I spent real time reseating parts that were never the issue. If a board and CPU both launched within a few months of each other, firmware compatibility should be the first suspect, not the last.
- Keep a spare USB drive around, always formatted FAT32 and empty. The five minutes I lost hunting for one and reformatting it were the most avoidable part of the whole afternoon.
- BIOS Flashback doesn’t care what state the rest of the build is in. That’s the whole point of it: it exists precisely for a board that won’t even initialize far enough to help you otherwise.
The build’s been running without issue since. The lesson stuck harder than the fix did.
🛒 Buy the Gear in This Guide
 AMD Ryzen 9 9950XView on Amazon →
 ASUS ROG Strix X870E-EView on Amazon →
 NVIDIA RTX 5090View on Amazon →
As an Amazon Associate we earn from qualifying purchases, at no extra cost to you. Prices and availability are shown on Amazon's own product page, not here, since they change constantly.
☕ Coffee Corner
Compiling, deploying, or waiting on a render? Here's what to brew while you wait.
🏠 Smart Home Picks
Same hobbyist care applied to your network and your front door.